Farming
Farmland Soil Testing Guide: Methods, Parameters & Benefits
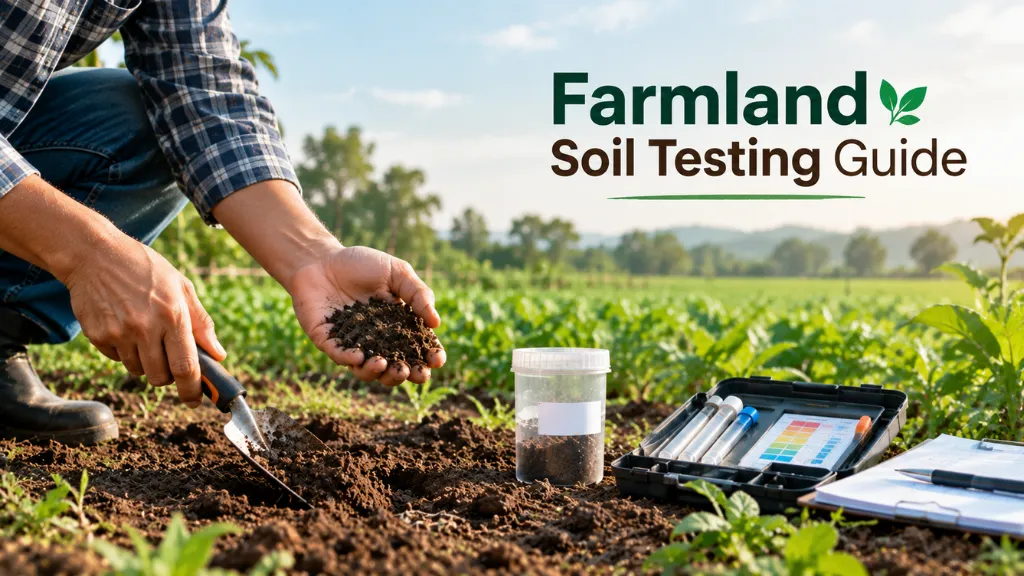
When I first visited a farmland, I used to think a lush patch of green grass automatically meant healthy dirt beneath my feet. I was wrong.
Over the years, I've seen how easy it is to misread what’s happening underground. You can pour money into organic compost or traditional fertilizers, but if your soil pH is off or its structure is compacted, your crops simply won't absorb those nutrients. That is where a systematic soil test report for agriculture changes everything.
It takes the guessing game away.
Proper agricultural soil testing isn't just about reading nitrogen levels on a lab sheet. Whether you are running a managed farmland plot, planting an orchard, or growing seasonal crops, taking the time to understand your soil testing procedure is the single best investment you can make for your land's future.
Here is my direct guide to the soil testing methods, essential soil testing parameters, and practical steps that actually work on the ground.
Also read: Soil Quality Indicators and How to Improve Them
Types of Soil Samples & How to Collect Them Right
If there is one lesson I have learned from collecting dirt across different patches of farmland, it is this: a lab test is only as good as the sample you send in.
If you just grab a handful of surface dirt near your farm gate, you are going to get misleading numbers. To get an accurate soil test report for agriculture, you need to understand the different types of soil samples and how to gather them properly.
1. Composite Sampling (The Gold Standard)
This is what I rely on for almost every plot on our farmland. Instead of testing one spot, you collect small cores of soil from 10 to 15 different locations across a uniform field, mix them together in a clean bucket, and pull one final sample from that mix. It gives you a true average of what is happening across the entire acre.
2. Spot or Grid Sampling
If you have a problem area, maybe a patch where fruit trees are yellowing or water logs constantly, do not mix that dirt with the rest of your land. Take a separate, targeted sample from that exact spot to diagnose localized issues like salinity, hardpan compaction, or severe nutrient drains.
Step-by-Step Soil Testing Procedure in the Field
You do not need fancy gear to gather samples, but you do need to follow a clean soil testing procedure. Here is the exact routine I use:
Clear the Surface: Scrape away dry leaf litter, weeds, and organic mulch from the top. You want actual soil, not decaying grass.
Dig a V-Shaped Hole: Push a clean spade about 6 to 8 inches deep into the root zone (for trees or deep roots, go down to 12 inches). Pull the spade out, leaving a clean V-shaped pit.
Slice a Core: Take a thin, 1-inch slice of soil straight down one side of the pit. Trim off the outer left and right edges, leaving a clean vertical strip down the center.
Mix in a Clean Plastic Bucket: Drop the strip into a bucket. Never use a metal or galvanized bucket, as it can leach trace minerals like zinc or iron into your sample and ruin your lab results.
Repeat in a 'W' Pattern: Walk your field in a zig-zag or 'W' shape, repeating steps 1–4 across 10 to 15 spots.
Air Dry and Pack: Mix all the cores thoroughly in the bucket. Spread about 500 grams of the mixed dirt on clean paper to air-dry in the shade (avoid direct hot sun or ovens). Once dry, pack it into a clean cloth or paper soil bag, label the field location clearly, and send it straight to the lab.
Decoding Your Lab Report
When your soil test report for agriculture comes back from the lab, it usually looks like a confusing sheet full of chemical symbols and numbers. I used to ignore half the page until I learned which numbers actually dictate crop health.
Here are the key soil testing parameters you need to look at first, and what they mean for your land:
pH Level (The Gatekeeper): This measures how acid or alkaline your soil is. Most crops thrive between 6.0 and 7.5. If your pH is out of balance, your plants cannot absorb nutrients, even if the dirt is loaded with fertilizer.
Organic Carbon (OC): This is the ultimate indicator of living soil. A reading above 0.75% is decent, but on our managed farmlands, we always aim higher. High organic carbon means your soil holds onto water longer and feeds beneficial underground microbes.
Electrical Conductivity (EC / Salinity): This tells you how much salt is built up in the dirt. Keep your EC under 1.0 dS/m. High salinity burns young roots and usually stems from poor drainage or irrigating with hard water.
Macronutrients (N-P-K):
Nitrogen (N): Drives leafy green growth.
Phosphorus (P): Builds strong roots and early flowers.
Potassium (K): Boosts drought resistance and fruit quality.
Micronutrients (Zinc, Iron, Boron): Your crops only need tiny trace amounts of these, but a hidden Zinc or Boron deficiency will cap your crop yield no matter how much N-P-K you add.
Understanding these numbers shows the true importance of soil testing, it stops you from blindly throwing fertilizers at a problem that might just be a simple pH or drainage issue.
Also Read: What Is Soil Fertility? Types, Importance, Factors
Checking Soil Life Without a Lab
While lab reports give you chemical numbers, some of the best soil testing methods only require a spade, a couple of mason jars, and 30 minutes of your time. I run these simple field tests every season to see how well our soil holds water and breathes:
The Slake Test (Structure Check): Drop a dry clump of topsoil into a jar of water. If it holds its shape, your soil has good biological "glue" and organic matter. If it instantly melts into mud, your soil structure is degraded and needs organic cover.
The Infiltration Test (Water Flow): Push a open plastic cylinder 3 inches into the dirt, pour in a glass of water, and time how long it takes to soak in. Water sitting on top for too long means heavy compaction; water vanishing instantly means you lack organic matter to retain moisture.
Earthworm Count (Life Indicator): Dig a foot-deep block of soil and sift through it. Counting 5 to 10 active earthworms in that spadeful is the easiest proof that your soil biology is thriving.
Combining these visual observations with your formal lab report gives you a complete, real-world picture of your farm's soil health.
Also read: What Is Soil Fertility? Types, Importance, Factors & How to Improve?
Putting Your Soil Test Results to Work
Getting a lab report or doing a couple of spade tests in the field is only half the battle. The real value of agricultural soil testing comes from what you do with those numbers over time.
Whenever I review soil data for a plot, here is the quick checklist I follow:
Fix pH First: Before buying any organic inputs or fertilizers, address your pH. If your soil is too acidic, apply agricultural lime; if it is too alkaline, work in gypsum or organic compost.
Feed the Soil Life, Not Just the Plant: Boost low organic carbon by introducing cover crops, green manure, or well-rotted farmyard compost instead of relying purely on synthetic inputs.
Test Consistently: Take your types of soil samples at the exact same time every year—ideally in the late autumn or post-harvest window. Keeping a historical record makes it easy to spot trends and adjust your management practices before yield drops happen.
Final Thoughts
Healthy, living soil is the cornerstone of any sustainable farm or managed farmland. When you take the time to understand your land's physical structure, biological activity, and chemical balance, you stop guessing and start building long-term soil fertility.
Grab a spade this weekend, run a quick field assessment, and get a sample sent off to the lab. Your land, and your future harvests, will thank you for it.
FAQs
1: What is the main importance of soil testing in agriculture?
Agricultural soil testing reveals exact nutrient deficiencies and pH levels so you can treat your land accurately without wasting money on unneeded fertilizers.
2: What are the key soil testing parameters I should check on my report?
Your soil test report for agriculture should focus on pH levels, organic carbon, salinity (EC), and primary macronutrients like Nitrogen, Phosphorus, and Potassium.
3: Which soil testing methods give the most accurate results for farmland?
Combining a laboratory chemical extraction test with simple on-field observational methods like the Slake test gives the most accurate picture of soil health.
4: How many types of soil samples should I collect across my field?
Use composite sampling for uniform field areas to get a reliable average, and separate targeted spot samples for specific problem areas.
5: What is the correct step-by-step soil testing procedure for taking samples?
Clear surface debris, dig a 6-to-8-inch V-shaped pit, slice a vertical core of soil, and combine 10 to 15 cores in a clean plastic bucket before drying and packing.
6: How often should I perform agricultural soil testing on my land?
Test your farmland soil once a year at the exact same season, preferably post-harvest or early autumn, to track long-term health trends.
When I first visited a farmland, I used to think a lush patch of green grass automatically meant healthy dirt beneath my feet. I was wrong.
Over the years, I've seen how easy it is to misread what’s happening underground. You can pour money into organic compost or traditional fertilizers, but if your soil pH is off or its structure is compacted, your crops simply won't absorb those nutrients. That is where a systematic soil test report for agriculture changes everything.
It takes the guessing game away.
Proper agricultural soil testing isn't just about reading nitrogen levels on a lab sheet. Whether you are running a managed farmland plot, planting an orchard, or growing seasonal crops, taking the time to understand your soil testing procedure is the single best investment you can make for your land's future.
Here is my direct guide to the soil testing methods, essential soil testing parameters, and practical steps that actually work on the ground.
Also read: Soil Quality Indicators and How to Improve Them
Types of Soil Samples & How to Collect Them Right
If there is one lesson I have learned from collecting dirt across different patches of farmland, it is this: a lab test is only as good as the sample you send in.
If you just grab a handful of surface dirt near your farm gate, you are going to get misleading numbers. To get an accurate soil test report for agriculture, you need to understand the different types of soil samples and how to gather them properly.
1. Composite Sampling (The Gold Standard)
This is what I rely on for almost every plot on our farmland. Instead of testing one spot, you collect small cores of soil from 10 to 15 different locations across a uniform field, mix them together in a clean bucket, and pull one final sample from that mix. It gives you a true average of what is happening across the entire acre.
2. Spot or Grid Sampling
If you have a problem area, maybe a patch where fruit trees are yellowing or water logs constantly, do not mix that dirt with the rest of your land. Take a separate, targeted sample from that exact spot to diagnose localized issues like salinity, hardpan compaction, or severe nutrient drains.
Step-by-Step Soil Testing Procedure in the Field
You do not need fancy gear to gather samples, but you do need to follow a clean soil testing procedure. Here is the exact routine I use:
Clear the Surface: Scrape away dry leaf litter, weeds, and organic mulch from the top. You want actual soil, not decaying grass.
Dig a V-Shaped Hole: Push a clean spade about 6 to 8 inches deep into the root zone (for trees or deep roots, go down to 12 inches). Pull the spade out, leaving a clean V-shaped pit.
Slice a Core: Take a thin, 1-inch slice of soil straight down one side of the pit. Trim off the outer left and right edges, leaving a clean vertical strip down the center.
Mix in a Clean Plastic Bucket: Drop the strip into a bucket. Never use a metal or galvanized bucket, as it can leach trace minerals like zinc or iron into your sample and ruin your lab results.
Repeat in a 'W' Pattern: Walk your field in a zig-zag or 'W' shape, repeating steps 1–4 across 10 to 15 spots.
Air Dry and Pack: Mix all the cores thoroughly in the bucket. Spread about 500 grams of the mixed dirt on clean paper to air-dry in the shade (avoid direct hot sun or ovens). Once dry, pack it into a clean cloth or paper soil bag, label the field location clearly, and send it straight to the lab.
Decoding Your Lab Report
When your soil test report for agriculture comes back from the lab, it usually looks like a confusing sheet full of chemical symbols and numbers. I used to ignore half the page until I learned which numbers actually dictate crop health.
Here are the key soil testing parameters you need to look at first, and what they mean for your land:
pH Level (The Gatekeeper): This measures how acid or alkaline your soil is. Most crops thrive between 6.0 and 7.5. If your pH is out of balance, your plants cannot absorb nutrients, even if the dirt is loaded with fertilizer.
Organic Carbon (OC): This is the ultimate indicator of living soil. A reading above 0.75% is decent, but on our managed farmlands, we always aim higher. High organic carbon means your soil holds onto water longer and feeds beneficial underground microbes.
Electrical Conductivity (EC / Salinity): This tells you how much salt is built up in the dirt. Keep your EC under 1.0 dS/m. High salinity burns young roots and usually stems from poor drainage or irrigating with hard water.
Macronutrients (N-P-K):
Nitrogen (N): Drives leafy green growth.
Phosphorus (P): Builds strong roots and early flowers.
Potassium (K): Boosts drought resistance and fruit quality.
Micronutrients (Zinc, Iron, Boron): Your crops only need tiny trace amounts of these, but a hidden Zinc or Boron deficiency will cap your crop yield no matter how much N-P-K you add.
Understanding these numbers shows the true importance of soil testing, it stops you from blindly throwing fertilizers at a problem that might just be a simple pH or drainage issue.
Also Read: What Is Soil Fertility? Types, Importance, Factors
Checking Soil Life Without a Lab
While lab reports give you chemical numbers, some of the best soil testing methods only require a spade, a couple of mason jars, and 30 minutes of your time. I run these simple field tests every season to see how well our soil holds water and breathes:
The Slake Test (Structure Check): Drop a dry clump of topsoil into a jar of water. If it holds its shape, your soil has good biological "glue" and organic matter. If it instantly melts into mud, your soil structure is degraded and needs organic cover.
The Infiltration Test (Water Flow): Push a open plastic cylinder 3 inches into the dirt, pour in a glass of water, and time how long it takes to soak in. Water sitting on top for too long means heavy compaction; water vanishing instantly means you lack organic matter to retain moisture.
Earthworm Count (Life Indicator): Dig a foot-deep block of soil and sift through it. Counting 5 to 10 active earthworms in that spadeful is the easiest proof that your soil biology is thriving.
Combining these visual observations with your formal lab report gives you a complete, real-world picture of your farm's soil health.
Also read: What Is Soil Fertility? Types, Importance, Factors & How to Improve?
Putting Your Soil Test Results to Work
Getting a lab report or doing a couple of spade tests in the field is only half the battle. The real value of agricultural soil testing comes from what you do with those numbers over time.
Whenever I review soil data for a plot, here is the quick checklist I follow:
Fix pH First: Before buying any organic inputs or fertilizers, address your pH. If your soil is too acidic, apply agricultural lime; if it is too alkaline, work in gypsum or organic compost.
Feed the Soil Life, Not Just the Plant: Boost low organic carbon by introducing cover crops, green manure, or well-rotted farmyard compost instead of relying purely on synthetic inputs.
Test Consistently: Take your types of soil samples at the exact same time every year—ideally in the late autumn or post-harvest window. Keeping a historical record makes it easy to spot trends and adjust your management practices before yield drops happen.
Final Thoughts
Healthy, living soil is the cornerstone of any sustainable farm or managed farmland. When you take the time to understand your land's physical structure, biological activity, and chemical balance, you stop guessing and start building long-term soil fertility.
Grab a spade this weekend, run a quick field assessment, and get a sample sent off to the lab. Your land, and your future harvests, will thank you for it.
FAQs
1: What is the main importance of soil testing in agriculture?
Agricultural soil testing reveals exact nutrient deficiencies and pH levels so you can treat your land accurately without wasting money on unneeded fertilizers.
2: What are the key soil testing parameters I should check on my report?
Your soil test report for agriculture should focus on pH levels, organic carbon, salinity (EC), and primary macronutrients like Nitrogen, Phosphorus, and Potassium.
3: Which soil testing methods give the most accurate results for farmland?
Combining a laboratory chemical extraction test with simple on-field observational methods like the Slake test gives the most accurate picture of soil health.
4: How many types of soil samples should I collect across my field?
Use composite sampling for uniform field areas to get a reliable average, and separate targeted spot samples for specific problem areas.
5: What is the correct step-by-step soil testing procedure for taking samples?
Clear surface debris, dig a 6-to-8-inch V-shaped pit, slice a vertical core of soil, and combine 10 to 15 cores in a clean plastic bucket before drying and packing.
6: How often should I perform agricultural soil testing on my land?
Test your farmland soil once a year at the exact same season, preferably post-harvest or early autumn, to track long-term health trends.
Akshata
You Might Also Like



Subscribe to the Swasya
newsletter
Discover insights about sustainable farming, investment opportunities, and the future of agriculture.
By subscribing, you agree to the Privacy Policy
Subscribe to the Swasya
newsletter
Discover insights about sustainable farming, investment opportunities, and the future of agriculture.
By subscribing, you agree to the Privacy Policy